ReSharper plugin template with tests
Prerequisites: VS2017 and ReSharper 2018.1.0
When I started to work on a compiled ReSharper extension aka plugin, I quickly realized how hard it is to set up an initial infrastructure. Reasons:
- Official DevGuide is great, but it is often a step behind.
- Existing plugins on GitHub contain too much stuff in them, and it is hard to extract relevant pieces, especially when you are new to it.
- Lack of my own experience in building NuGet packages.
I would like to share an absolutely minimal ReSharper plugin template with tests. I created it using dotnet new template engine. Template source code is here.
This post does not pretend to be an ultimate guide. On the contrary, it contains 20% of the knowledge you need to get started, and the remained 80% are links to useful information.
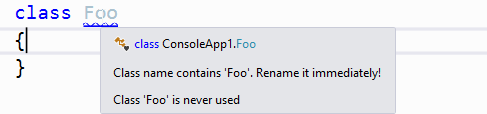
When the plugin is installed into a Visual Studio, it checks if a class name contains ‘Foo’ and displays a warning:
Getting started
dotnet new --install ReSharper.MinimalPluginTemplate
The plugin should appear in the template list: 
To generate a project, using the installed template use:
dotnet new ReSharper.MinimalPlugin --name ReSharper.MyPlugin --output <Path_To_Folder>
--name defines an output name.
Important! Name must contain at least one dot. Otherwise, you might experience difficulties when installing the plugin into a Visual Studio. Throughout this guide, I’ll use ReSharper.MyPlugin name.
--output specifies the destination folder. E.g. c:\temp\MyPlugin
Open ReSharper.MyPlugin\src\ReSharper.MyPlugin.sln, compile and run tests in ReSharper:
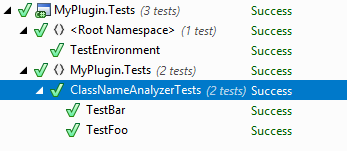
Yes, that’s it. A fully functional plugin with tests. The plugin is not yet installed into a Visual Studio, but we’ll get there.
Now, when your initial curiosity is satisfied, let me explain how it works and why everything is done that way.
Folders layout

ReSharper plugin should follow folder layout convention described here
The layout looks weird, but I don’t recommend to deviate from it, especially in the beginning. src contains plugin code. test contains test code. Visual Studio solution lives in src/ReSharper.MyPlugin.sln.
src/ReSharper.MyPlugin.csproj
- Depends on JetBrains.ReSharper.SDK 2018.1.0.
- Targets 4.5.2 .NET framework as all ReSharper must be based on 4.5.x at the moment.
/src/ClassNameAnalyzer.cs and /src/ClassNameWarning.cs
ClassNameAnalyzer checks if a class name contains Foo. It targets a class declaration, as dictated by its base class and ElementProblemAnalyzer attribute. If analysis finds that class name contains ‘Foo’, it’ll assign ClassNameWarning to a corresponding piece of code:
if (element.DeclaredName.Contains("Foo"))
    {
        consumer.AddHighlighting(new ClassNameWarning(element, element.NameIdentifier.GetDocumentRange()));
    }
As a result, you’ll see this:
and a sidebar mark:
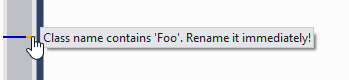
Read more: ElementProblemAnalyzer and Highlighting
test/src/ReSharper.MyPlugin.Tests.csproj
- Targets 4.6.1 .NET framework.
- Depends on JetBrains.ReSharper.SDK.Tests 2018.1.0
ReSharper test SDK allows you to tests real integration with Visual Studio. These tests are slow, but they are much faster than installing a plugin and restarting a Visual Studio.
test/src/TestEnvironment.cs
Contains bootstrap code needed by ReSharper to run tests. It uses NUnit setup test fixture. The bootstrap code must be executed first. It is done by moving TestEnvironment the global namespace. This way NUnit will execute TestEnvironment prior to any other tests.
test/data/nuget.config
ReSharper simply needs it to run test properly. Read here why.
test/src/ClassNameAnalyzerTests.cs
ReSharper test framework runs plugin against input files and compares an output with gold files .
Let’s look at this test:
[Test]
public void TestFoo()
{
    DoNamedTest2();
}
When ReSharper test runner makes a call to DoNamedTest2(), it looks for a test/data/Foo.cs and compares it against test/data/Foo.cs.gold
/src/MinimalReSharperPlugin/Install
src/Install/pack.bat produces NuGet package, which is required to install your plugin into a Visual Studio or upload it to the ReSharper gallery
plugin.nuspec contains NuGet specification for the package.
One tricky thing, you need to know about, is the Wave dependency. plugin.nuspec contains this:
<dependencies>
    <dependency id="Wave" version="[12.0]" />
</dependencies>
“Wave” is a “virtual” package. Your extension will not be visible in ReSharper Extension manager without it. But why “12.0”? You can find the wave version in your SDK’s dependencies:

It worth mentioning, that ReSharper Platform is not backward compatible. It means 2 things:
- As a plugin developer, you have an access to all the API, JetBrains devs do.
- When a new version of ReSharper comes out, you need to update a plugin SDK, fix all the potential breakages, and put your plugin a new ‘wave’ so it becomes available on the ReSharper Gallery. I saw attempts to automate this. For example here nuke build script uses GetWaveVersion to extract wave version from project dependency.
Installing plugin
Make a NuGet package:
ReSharper plugins are distributed in a form of NuGet packages. To make a NuGet package do this:
- Build Release version of the plugin.
- Run
src\ReSharper.MyPlugin\Install\pack.bat. You’ll see this warning: It is ok: ReSharper expects this NuGet package structure.
Step #2 will produce ReSharper.MinimalPlugin.nupkg inside src\ReSharper.MyPlugin\Install. If you want to change the package name and other parameters, edit src\ReSharper.MyPlugin\Install\plugin.nuspec. Note, that name must be unique within the ReSharper gallery and contain at least one dot.
Install ReSharper into Visual studio hive
When developing plugins it is recommended to use an experimental instance of Visual Studio aka hive. To install ReSharper into a hive version of Visual Studio do this:
Assuming that ReSharer is already installed into non-hive version:
- Run ReSharper 2018.1.0 installation.
- Click options:
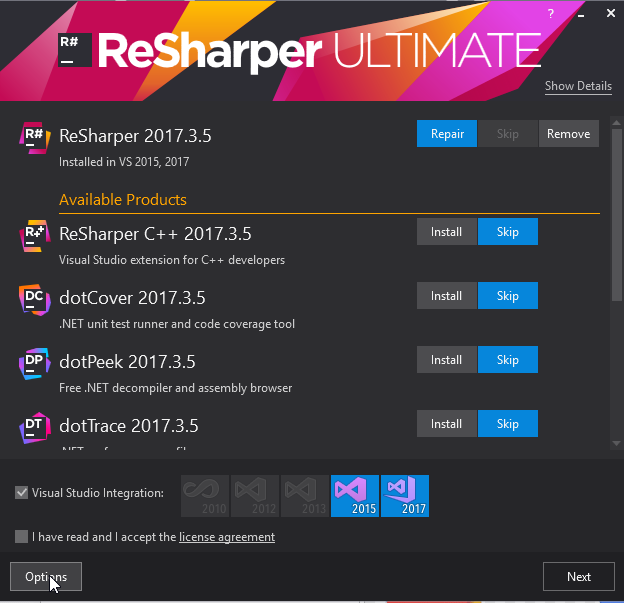 .
. - Click on
Install into experimental instance. - Type
Plugins.
Install the plugin into a hive version of Visual Studio.
- Check if
src\ReSharper.MyPlugin\Install\StartHiveVS.batrefers to an existing path and run it. - Click
ReSharper->Extension Manager->Options. - Add a new source. It must point to the directory which contains
ReSharper.MyPlugin.0.0.0.1.nupkg. - Click
Save. - Your plugin should be in Extension Manger’s list:
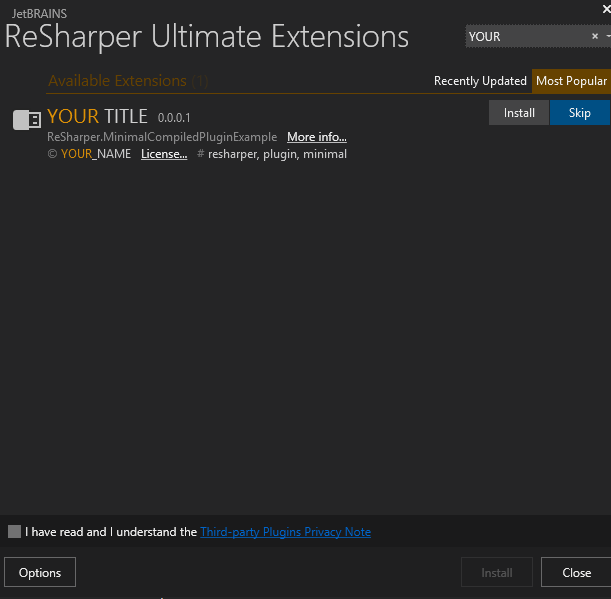 .
. - Install it.
- Create C# console application, add a class named ‘Foo’ and check if the warning appears.
Copy plugin on build (optional)
You don’t need to install your plugin every time you make a change. Once installed you can setup copy-on-build. To do this go to ReSharper.MyPlugin.csproj and uncomment:
<!-- Uncomment it to enable copy-on-build
    <Import Project=".\install\CopyToReSharperInstallationsDirectory.targets" />
-->
Note, if a hive instance is running, you’ll get a copy error. I find this approach annoying, but it can be helpful if your plugin does not have tests.
Getting help
- How To was useful to me.
- Github contains plenty of examples e.g. I like this one. JetBrains devs keep up-to-date.
- ReSharper-plugins google group. I got my answer within few hours.
Enjoy!